


20 Mar

GENERAL INFORMATION ON HOW THE MODULE WORKS
Link to the module: https://www.opencart.com/index.php?route=marketplace/extension/info&extension_id=40821
This extension is necessary for any store owner who wants to know what happens to the files and images on the server, especially so that images are not orphaned when deleting products. It also provide functionality to delete respective images when a product is deleted. This prevents orphaned images from appearing, which complicate the work and fill the available space.
Module can handle tens of thousands of images and huge databases. The analyzes are performed in 4 steps, described in detail in this document and in the module itself. The file system of the server is scanned first - image, image/catalog, or given image sub-directory). In this step files are loaded into a specially created table in the database. In module settings it is possible to set a list of directories and a list of files that do not participate in the analysis.
In the second step, the loaded files in the table are analyzed if and where they are used, and this information is presented to the user in tabular form. Here the procedure takes a lot of time, because for each image the whole database is searched according to set criteria. There is no problem with this, because if a timeout occurs and the procedure is interrupted, it is restarted and continues from where it left off. And with very large data sets, this can be achieved in a few sessions.
In the third step, the user can filter and sort the received information by various criteria, the most useful being "by unused". Then use the checkboxes buttons in the leftmost column to select some or all of the files and folders that you can use to back them up with the button at the top right. This can also be done several times by setting how many rows will be displayed in the table in the module options. In practice, a number of several thousand can be set, ie. to backup a huge number of files at once. Backup means transferring files and folders to a single directory (.como_deleteimages_backup) while preserving the directory structure. Later, once you are sure that everything is OK - you can delete this directory.
The last step is to empty the table itself so that it does not take up server space. Until the new analyzes with the module.
We decided not to do an automated procedure for archiving all the information before using the module, as all security procedures are built in to prevent the deletion of used files. However, we recommend that you back up the image directory through the hosting file manager of the server before starting the analysis. Just in case. In addition to group backup, the table provides the ability to "manually", Ajax, delete or backup individual files.
ACTIONS AFTER SUCCESSFUL INSTALLATION
www.esoft.cmstory.com
Link to the module: https://www.opencart.com/index.php?route=marketplace/extension/info&extension_id=40821
This extension is necessary for any store owner who wants to know what happens to the files and images on the server, especially so that images are not orphaned when deleting products. It also provide functionality to delete respective images when a product is deleted. This prevents orphaned images from appearing, which complicate the work and fill the available space.
Module can handle tens of thousands of images and huge databases. The analyzes are performed in 4 steps, described in detail in this document and in the module itself. The file system of the server is scanned first - image, image/catalog, or given image sub-directory). In this step files are loaded into a specially created table in the database. In module settings it is possible to set a list of directories and a list of files that do not participate in the analysis.
In the second step, the loaded files in the table are analyzed if and where they are used, and this information is presented to the user in tabular form. Here the procedure takes a lot of time, because for each image the whole database is searched according to set criteria. There is no problem with this, because if a timeout occurs and the procedure is interrupted, it is restarted and continues from where it left off. And with very large data sets, this can be achieved in a few sessions.
In the third step, the user can filter and sort the received information by various criteria, the most useful being "by unused". Then use the checkboxes buttons in the leftmost column to select some or all of the files and folders that you can use to back them up with the button at the top right. This can also be done several times by setting how many rows will be displayed in the table in the module options. In practice, a number of several thousand can be set, ie. to backup a huge number of files at once. Backup means transferring files and folders to a single directory (.como_deleteimages_backup) while preserving the directory structure. Later, once you are sure that everything is OK - you can delete this directory.
The last step is to empty the table itself so that it does not take up server space. Until the new analyzes with the module.
We decided not to do an automated procedure for archiving all the information before using the module, as all security procedures are built in to prevent the deletion of used files. However, we recommend that you back up the image directory through the hosting file manager of the server before starting the analysis. Just in case. In addition to group backup, the table provides the ability to "manually", Ajax, delete or backup individual files.
ACTIONS AFTER SUCCESSFUL INSTALLATION
- Go to the admin panel of the module and make the settings. Each one is written in detail, and has default values. Press the save button.
- Go to the analytics page. This is done with the button shown below.
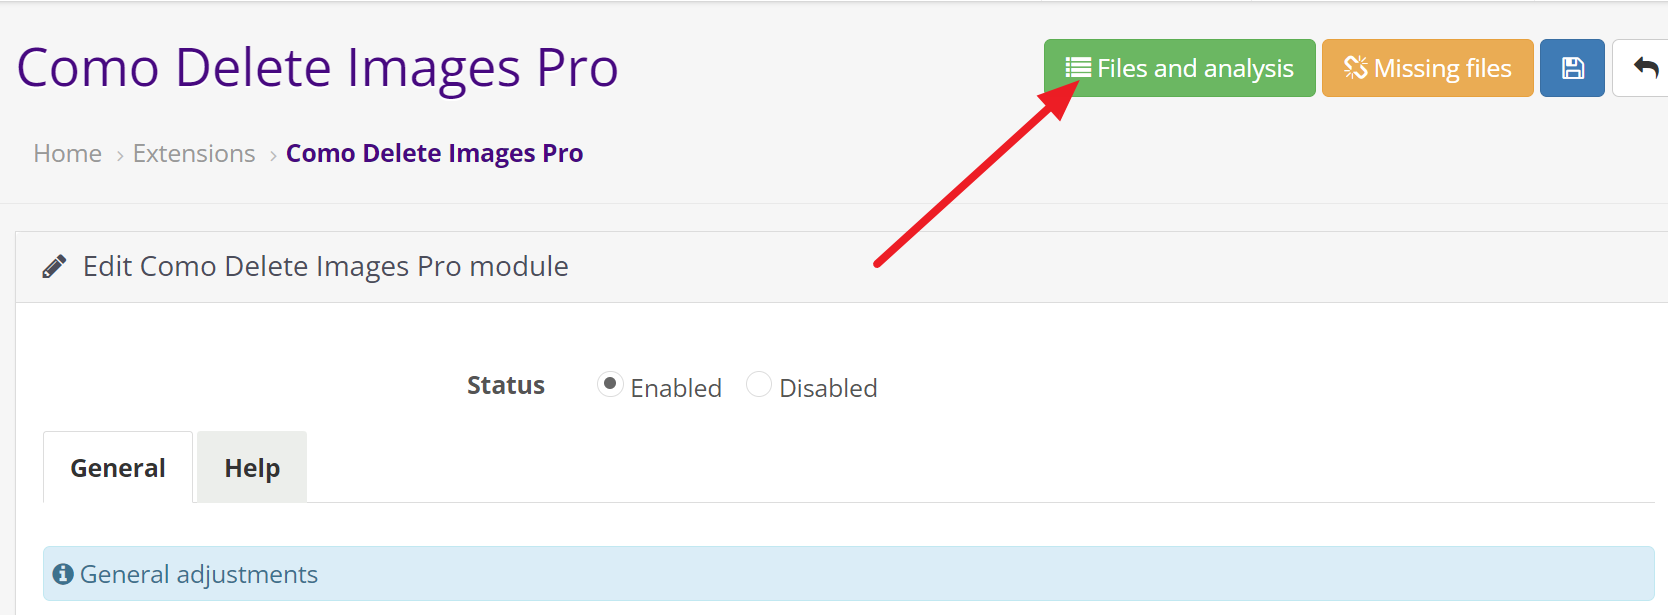
- Use the buttons in the upper right corner of the page shown below in order from left to right.

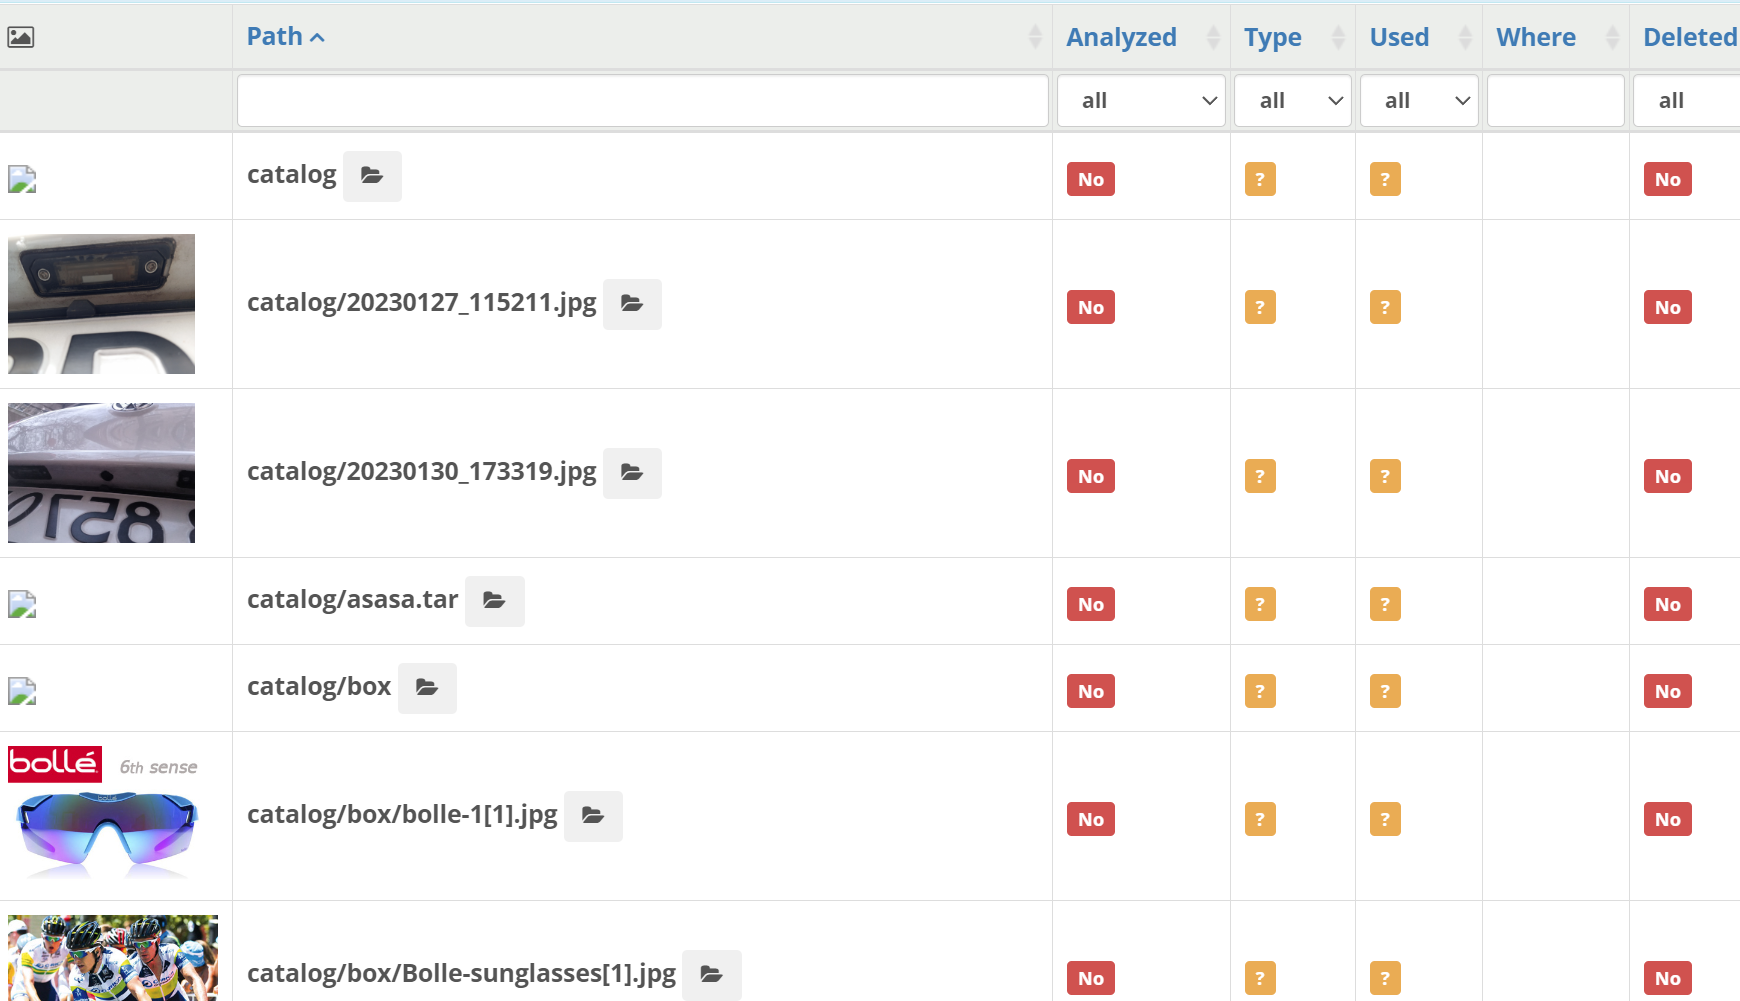
- Reload - This is the first step. Scans the specified path and subdirectories and fills in the table for further analysis. As a result, the table will be filled with all your images according to the scan directories entered in the settings (by default, these are all your images in the catalog). The result is something like this:
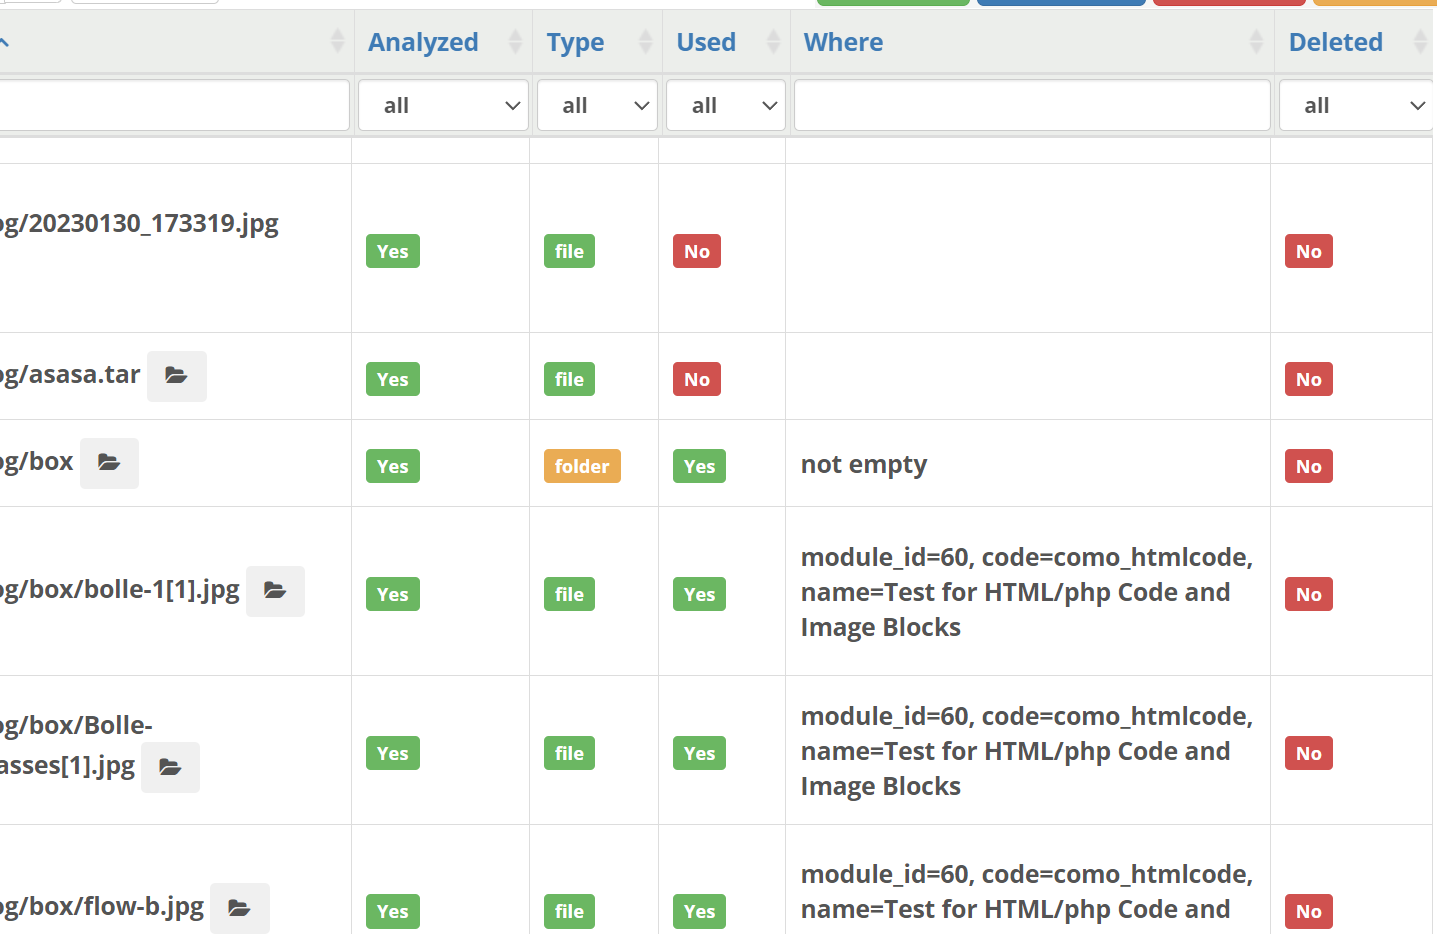
- Analyze - This is the second step. Analyzes the completed table with files and directories, marking which ones are used and where. You do not need to select in the leftmost column. The procedure takes longer, and if it is interrupted due to a timeout (Internal Server Error), go "Back" and run it again - it will continue from where it left off. Continue until the filter on the unanalyzed gives an empty result.
Notice that the columns in the table are populated with the information needed to decide what to do with the corresponding image:
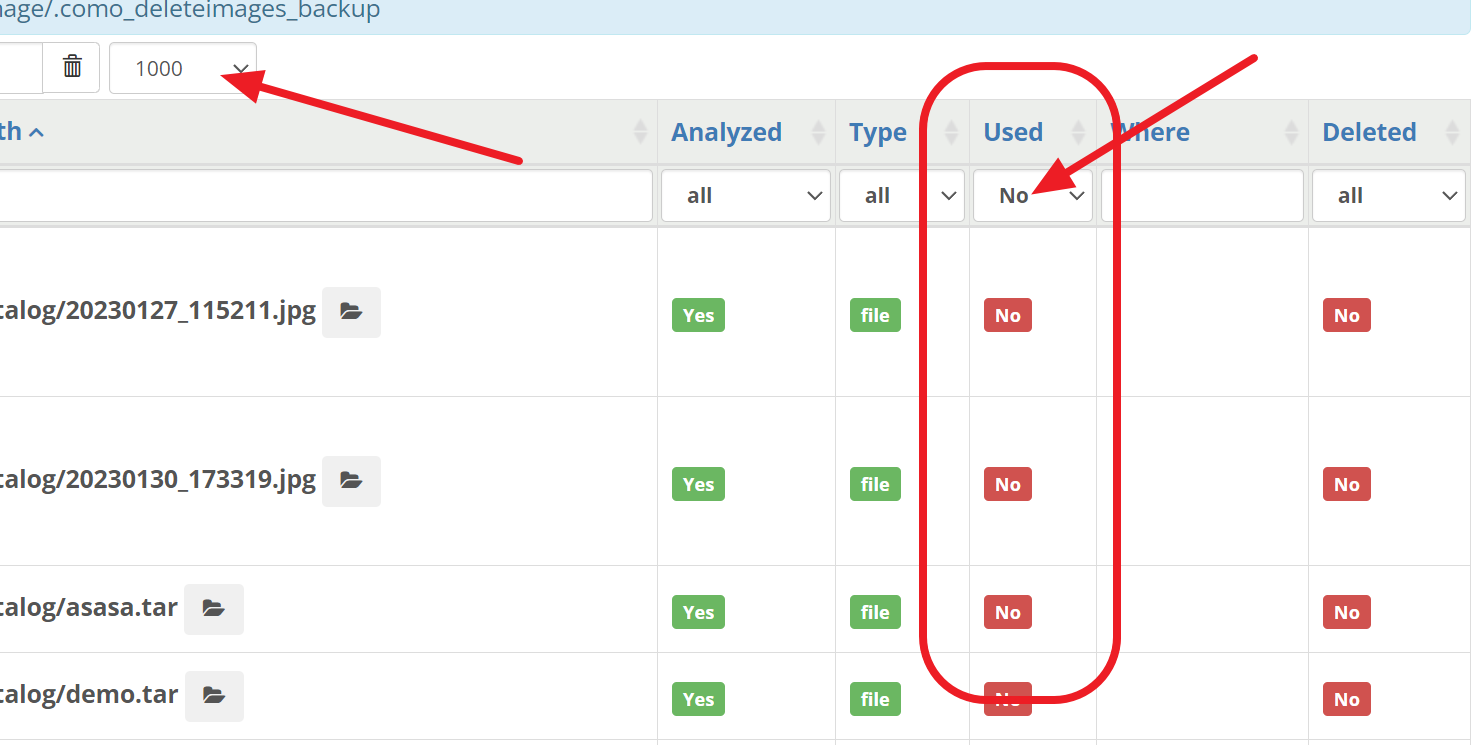
- Filter the table by "unused" criteria and determine how many rows you want to see at once. This is done with the controls shown below:
- Now you're ready to back up or just delete. One possibility is the files one by one, with the buttons located on the corresponding row of the table:
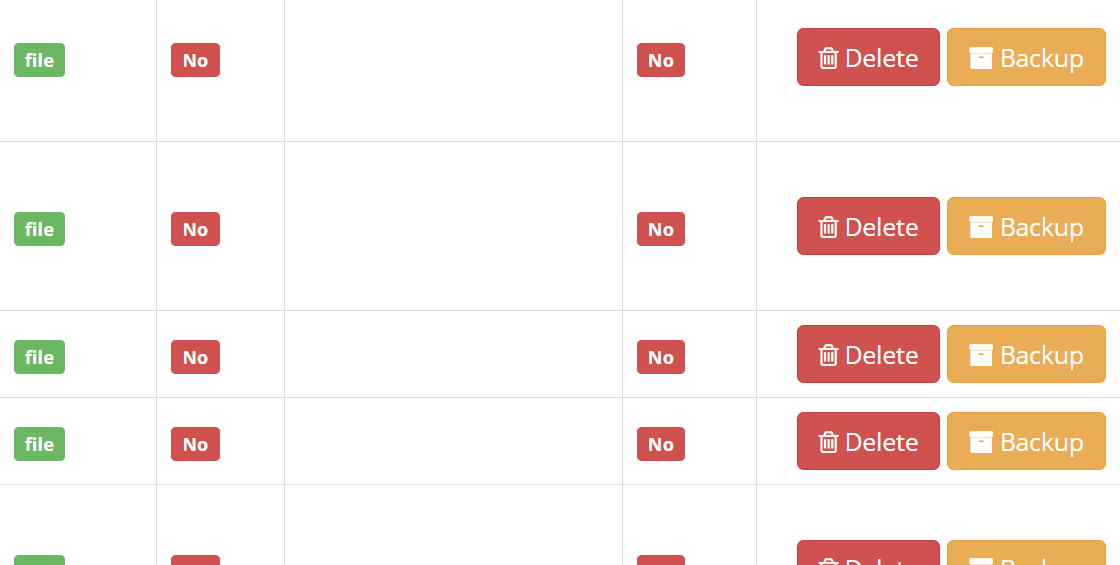
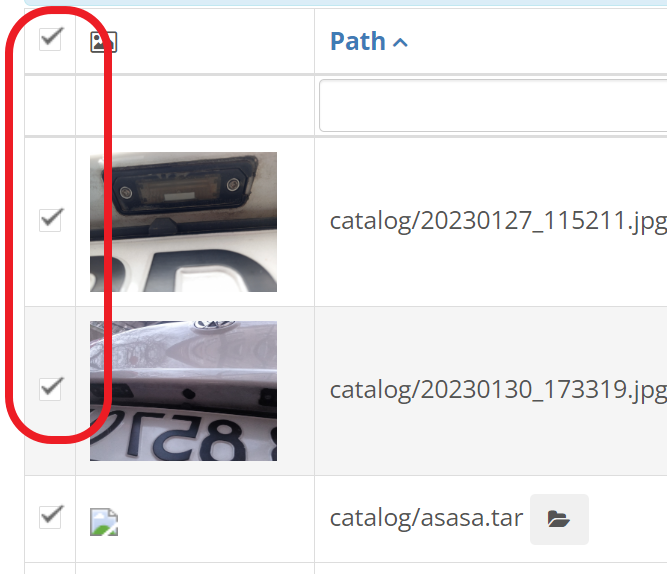
- Deleting, or more precisely, archiving more than one file at a time, is done by first selecting (marking) them, with the marking buttons in the leftmost column:
- Backup - This is the next step to remove many items at once. Only the selected ones in the leftmost column are processed. Even if selected, the files used will not be backed up. As mentioned above, it is a good idea to filter out unused ones. The procedure takes time, and if it is interrupted due to a timeout, run it again - it will continue from where it left off.

- When you're done cleaning up, it's a good idea to empty the table so it doesn't take up space in the database. This is done with the last button shown in the picture above.
- When more images are removed, we use the so-called "backup" button, which is effectively a move to a folder subcategory of the catalog, and is named ".como_deleteimages_backup". You can easily empty this directory when you're sure you didn't make a mistake while deleting.
www.esoft.cmstory.com
Related Products


This extension is necessary for any store owner who wants to know what happens to the files and images on the server, especially so that images ..
35.00€ (68.45лв.)
Leave a Comment